You are using an out of date browser. It may not display this or other websites correctly.
You should upgrade or use an alternative browser.
You should upgrade or use an alternative browser.
How To Convert Reverse lights to LED
- Thread starter robz32
- Start date
Ozstung
5000 Posts Club!
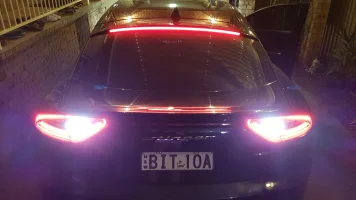
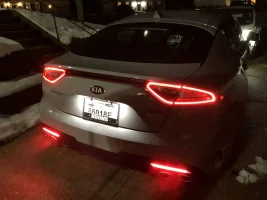
Finally got around to doing the LEDs conversion. Robz32 instruction really helped and so did his list of tools required.
The only delay as some others have pointed out was trying to disengage the connectors. I couldn't release them until i had the light bar at out a bit and unclipped them from the top side with the long nose pliers. It was the pliers that surpressed the holding clips that i otherwise couldn't see.
All else was easy i had to tear the foam as instructed to release the tension on the wires so i could get the bulb and holder out straight. Putting the wider leds in meant the holder and leds had to be put in straight it was a tight fit but all went well.
Certainly worth it. Thanks all.
Ozstung
5000 Posts Club!
StingerNick
Active Member
Looks great! Also, did you do the third brake light yourself? Which one did you get?
Ozstung
5000 Posts Club!
Yes i got the third tail light its known as "Convoy" the finish quality is absolute sh#t. I bought it here from.one of the advertisers. I had to get it sanded back and repainted that alone cost me $200aud cash.
I got an auto electrician to fit it, he did a good job. I wouldn't do it myself and im glad i didn't. I love the look.
Pm if you want to know more im over shaming them for the product quality. And i haven't.
Unfortuntly i had it fitted before i could see in bright light where the mark was.
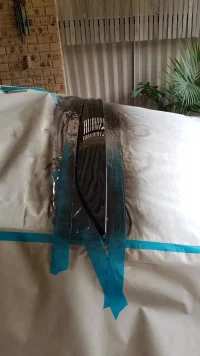
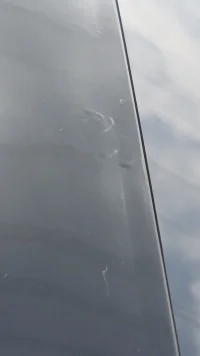
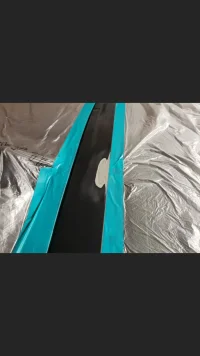

I got an auto electrician to fit it, he did a good job. I wouldn't do it myself and im glad i didn't. I love the look.
Pm if you want to know more im over shaming them for the product quality. And i haven't.
Unfortuntly i had it fitted before i could see in bright light where the mark was.


From interior to exterior to high performance - everything you need for your Stinger awaits you...
StingerNick
Active Member
Did you get this from the K8 store or Tuscani? Just wondering if everyone get the same product from a mystery manufacturer.Yes i got the third tail light its known as "Convoy" the finish quality is absolute sh#t. I bought it here from.one of the advertisers. I had to get it sanded back and repainted that alone cost me $200aud cash.
I got an auto electrician to fit it, he did a good job. I wouldn't do it myself and im glad i didn't. I love the look.
Pm if you want to know more im over shaming them for the product quality. And i haven't.
Unfortuntly i had it fitted before i could see in bright light where the mark was.
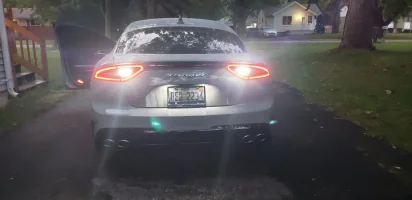
View attachment 19808 View attachment 19810 View attachment 19811 View attachment 19811
Shrikecorp
Stinger Enthusiast
Gtecko
Stinger Enthusiast
Great DIY , thank you !
BlasterJax93
Active Member
From interior to exterior to high performance - everything you need for your Stinger awaits you...
@jmf_tracy , I just installed those ones last night! went smooth with the help of this thread
@jmf_tracy , I just installed those ones last night! went smooth with the help of this thread
@twig2121 - Thanks, good to hear!
DistrictStinger
Member
great write up.
Thanks, i just purchased from Amazon:
LUYED 2 Extremely Bright 1600 Lumens Backup Reverse Lights 921 912 W 16W 3020 30-EX Chipsets, Xenon White, No Hyper Flash
Just installed these and everything worked perfectly!
Tips:
- Use a pair of latex gloves and you can avoid having to wipe fingerprints off of everything

- Lay a clean towel or array of clean paper towels down in your truck for you to lay your taillight assembly on without scuffing it.
LaserJet
Member
Great instructions and suggestions. I took it all in, and did the procedure in about 15 minutes without any issues. Thank you!
The backup camera picture at night has been greatly improved. Instead of being grainy and fuzzy it is now full colour with a hint of depth perception.
I wonder if there is a way to boost the lights under the wing mirrors to improve the side views in 360 camera?
The backup camera picture at night has been greatly improved. Instead of being grainy and fuzzy it is now full colour with a hint of depth perception.
I wonder if there is a way to boost the lights under the wing mirrors to improve the side views in 360 camera?
turboAWD
1000 Posts Club!
Just did it - and after foolishly removing 2 black nuts and 1 silver nut per side and wondering why it wasn't coming off... Looked closer and found the 3rd black nut on each side. After that, piece of cake.
Lights work correctly - auto hold is AWESOME for checking this. Close door, start car, put in R, activate "auto hold", get out and look!
Lights work correctly - auto hold is AWESOME for checking this. Close door, start car, put in R, activate "auto hold", get out and look!
From interior to exterior to high performance - everything you need for your Stinger awaits you...
StingerNick
Active Member
I never thought of using Auto-hold like that. Good thinking!Just did it - and after foolishly removing 2 black nuts and 1 silver nut per side and wondering why it wasn't coming off... Looked closer and found the 3rd black nut on each side. After that, piece of cake.
Lights work correctly - auto hold is AWESOME for checking this. Close door, start car, put in R, activate "auto hold", get out and look!
______________________________
Pnbnationsbest
Stinger Enthusiast
StingerNick
Active Member
Pnbnationsbest
Stinger Enthusiast
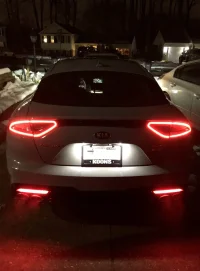
Looks great, excellent color choice too! Change out the rear reflectors for the tail lights too. This was my first mod.
View attachment 30577 View attachment 30578
Thanks, my reflectors are replaced by black vinyl pieces.
Meckman
Active Member
Ordered up the Sylvania ones from Amazon. Installed them today. Fired up the car and neither one worked. Had to rip them back out and installed the original bulbs back in. Returned the Sylvania to Amazon and ordered up the Luyed chips mentioned earlier. So I get to do it all over again tomorrow. Got to love one day shipping from Amazon.
From interior to exterior to high performance - everything you need for your Stinger awaits you...


