Kiteflygolfdrive
Active Member
- Joined
- Dec 21, 2021
- Messages
- 128
- Reaction score
- 121
- Points
- 43
This is more of a what did you do this week to your stinger type post.
Sunday: CRC treatment
Monday: wash and clean the interior (darn you Hurricane Nicole)
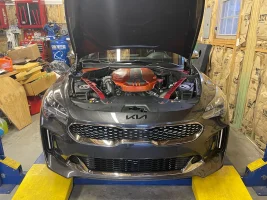
Tuesday: KIA service check, aFe intake, VT snorkels w/lit kit
Wednesday: JB4 w/EWG, new MBRP active exhaust install for 22/23 models
Thursday: rerouted/wire management rethink and update using conduit
Friday: will be a rest day
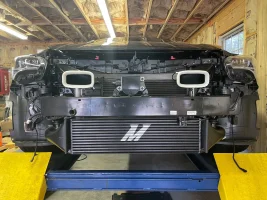
Sometime this weekend: Mishi intercooler
Wife is happy the boxes are out of the dining room.")
Each day after install I drove the car about 30-40 miles hard to ensure no engine codes.
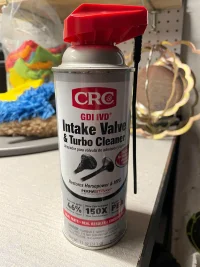
CRC treatment:
I did notice a slight difference. Maybe placebo effect but it just sounded smoother. I sprayed through the throttle body. I’ve had a Mishi OCC from day 1 so it shouldn't be too bad. I’ll probably do this with each oil change.
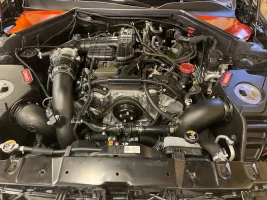
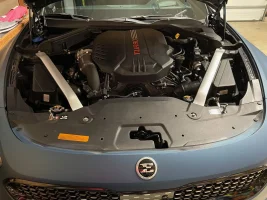
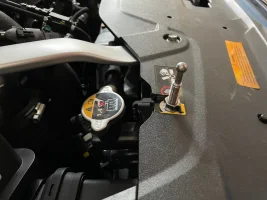
aFe install:
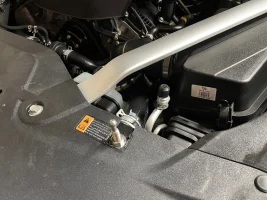
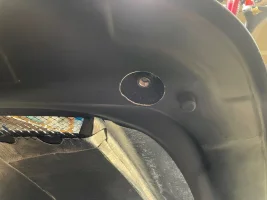
Super easy. Just follow the directions and watch the install video. I had no problem with intake box bolt fitment. Yes, the 2 #32 clamps were missing from the parts. Just reuse the OEM clamp. It is ironic that there’s a quality inspection signature. I guess the same guy is inspecting all kits since so many folks are missing the #32s. I included a picture of the OEM #32 ring that’s on the turbo which you’ll need to use for installation. I had to trim both blow off valve tubes slightly. Used a well sharpened wood saw and then burned the scraggly nylon threads. Better this than the alternative. Fitment of all parts was “like a glove”.
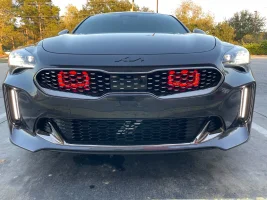
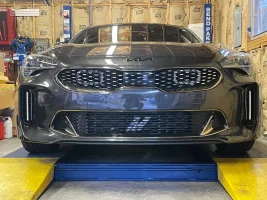
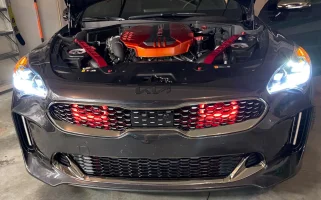
VT lit kit and snorkels:
Also very easy. No issues. Downloaded the app, connected straightaway. I was trying to use a fuse tap that is on/off with the ignition but couldn’t find one that fit our fuses. So I gave up and just wired in the switch. Maybe I’ll reattack that in the future, but for now it’s done. I trimmed the black OEM air scoop in preparation for the FMIC install, but then couldn’t figure out proper trimming to have it go around the snorkels so I shelved that part and just removed it. The MIshi IC install video has a great section on removing/reinstalling the wiring harness Which is attached to it.
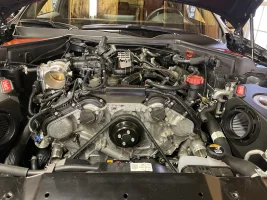
JB4 with EWG:
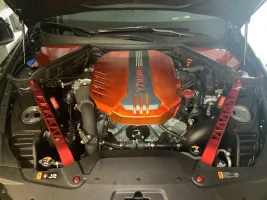
JB4 very easy install. Just lay it out first and think about wire management. Don’t just hook them up and not think about the routing. You can, but it will look like a box of spaghetti attacked your engine bay. There are many routes, but some are better than others. I used 1/4 and 3/8 conduit for all wires to give it a more polished look. Then zip tied them into place. I used 3M velcro style command strips to attach the JB4 and bluetooth controller. Note the small instruction on which direction to place the BT controller. Simple connect and ensured firmware update and enabled windshield wiper functionality.
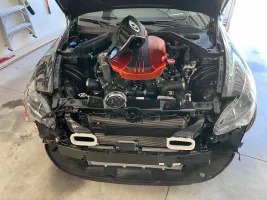
EWG: I turned this into a PITA unnecessarily. My bad but live and learn. I should have installed them when I did the aFe intakes. Would have saved a lot of time. I had read somewhenre that you could reach them from the bottom fairly easy. Not on a 22!!!!! I removed the splash pan while doing the exhaust. I was able to do the driver side with much difficulty. Impossible to do the passenger from the bottom. So today I removed the passenger intake and ducting to access the waste gate. No problem. I then removed just the ducting on the drivers side (Not the intake box) and had clear access to the waste gate plug. Unplugged and reinstalled/rerouted the drivers EWG and make it more polished. Programmed proper EWG settings based on the JB4tech forums.
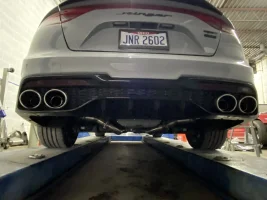
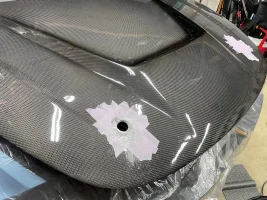
MBRP active exhaust for 22/23 models
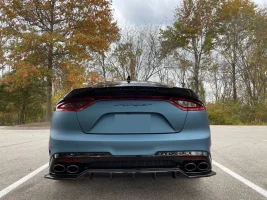
Once again easy install. Since my car has so little miles the bolts came off very easily. Uninstall from rear to front. Install front to back. Leave bolts loose at first until all parts are ”hanging” from the car. then tightened from front to back. I cleaned the gaskets and then reinstalled using exhaust grease on both sides of the gaskets. The gaskets are smooth, not rippled so I wanted to remove any previous grime/grease and ensure a solid seal. I installed the exhaust as far to the rear as possible and they still only extend about 1in into the OEM chrome tips. The noise inside is noticeably louder than stock. I love the sound outside but still hoping to find a solution to increased interior noise levels. Possible solutions are clamp on a 2-3inch extension pipe and/or wait for the MBRP exhaust tips that David at K8 said are in development. Active exhaust electrical installation. It’s very straightforward and simple. Just be sure (as mentioned in the directions) the valve is open during installation.
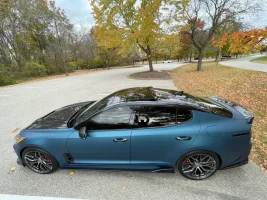
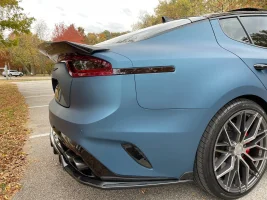
As a side note a friend is going to powdercoat my chrome tips gloss black to match the rest of the car.
I’d like to acknowledge the following folks for their online YouTube and forum help during this process. This info is to stinger maintenance and upgrades as WebMD is to Healthcare. Without their help I never would have attempted this:
StingerForum
This place is a wealth of knowledge. Lots of been-there-done that, how to, tips and tricks. THANK YOU! ! I hope this post helps and motivates others to attempt projects they might not have attempted otherwise.
JB4 tech website
So much info over there specifically for the JB4. I went though a large chunk of it before my purchase.
Mark at Performance Auto and JulianwithanX spark plugs
I did this a few weeks ago in prep for the JB4
KJ Lifestyle and Julian withanX
aFe intakes and JB4 install
( the most complete up to date instructions in video format)
Stinger_gt21
front number removal (I’m a pro now)
Kia stinger front bumper removal (2018-2022)
aFe power
high quality intake install video
aFe POWER 2018-22 Kia Stinger V6 3.3L (tt) Takeda Intake Install #kiastinger #takeda #afeintake
First Coast Garage
EWG wires
Kia Stinger 3.3 JB4 EWG install
KDM_Curt and Stung_by_Kia (Eric)
VT snorkels and lit kit
Installing LED "Lit Kit" Big Mouth Intake Snorkels! (2022 Stinger Bumper Removal)
Velossa Tech Big Mouth Gen4 with LIT - step by step install - Kia Stinger
MBRP exhaust
Dave at K8 on these forums and via email
Other various folks since the release of the new active exhaust for 22+
TWN2RBO on YouTube
Various install videos, motivation and all around positivity. Keep up the good work.
There are plenty of other videos out there that are helpful, but these are the primary ones I referenced and watched multiple times before attempting this project.
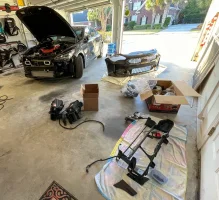
I looked at this as a big (although expensive) Lego set. It just takes time. If you get tired take a break and reattack later. Better to go slow and not make a mistake than to rush and miss a step, not tighten a clamp or fail to connect an electrical connection. That’s why I spent today doing clean up items and making sure everything is solid before tackling the FMIC this weekend. I know this will result in some work being reaccomplished, but I know the system so well now I’m not worried at all. Learning from my mistakes should pay dividends this weekend.
I give up trying to rotate pics correctly.
UPDATE: I forgot to mention have ahead lamp on hand. I saw one person had the odelphi headlamp so I purchased one. Now that it’s getting darker earlier this helped when the install went longer than I expected. im really glad I had one. For some of those tighter spots in the engine bay.
Sunday: CRC treatment
Monday: wash and clean the interior (darn you Hurricane Nicole)
Tuesday: KIA service check, aFe intake, VT snorkels w/lit kit
Wednesday: JB4 w/EWG, new MBRP active exhaust install for 22/23 models
Thursday: rerouted/wire management rethink and update using conduit
Friday: will be a rest day
Sometime this weekend: Mishi intercooler
Wife is happy the boxes are out of the dining room.
Each day after install I drove the car about 30-40 miles hard to ensure no engine codes.
CRC treatment:
I did notice a slight difference. Maybe placebo effect but it just sounded smoother. I sprayed through the throttle body. I’ve had a Mishi OCC from day 1 so it shouldn't be too bad. I’ll probably do this with each oil change.
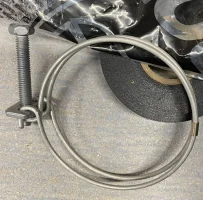
aFe install:
Super easy. Just follow the directions and watch the install video. I had no problem with intake box bolt fitment. Yes, the 2 #32 clamps were missing from the parts. Just reuse the OEM clamp. It is ironic that there’s a quality inspection signature. I guess the same guy is inspecting all kits since so many folks are missing the #32s. I included a picture of the OEM #32 ring that’s on the turbo which you’ll need to use for installation. I had to trim both blow off valve tubes slightly. Used a well sharpened wood saw and then burned the scraggly nylon threads. Better this than the alternative. Fitment of all parts was “like a glove”.
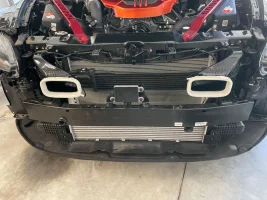
VT lit kit and snorkels:
Also very easy. No issues. Downloaded the app, connected straightaway. I was trying to use a fuse tap that is on/off with the ignition but couldn’t find one that fit our fuses. So I gave up and just wired in the switch. Maybe I’ll reattack that in the future, but for now it’s done. I trimmed the black OEM air scoop in preparation for the FMIC install, but then couldn’t figure out proper trimming to have it go around the snorkels so I shelved that part and just removed it. The MIshi IC install video has a great section on removing/reinstalling the wiring harness Which is attached to it.
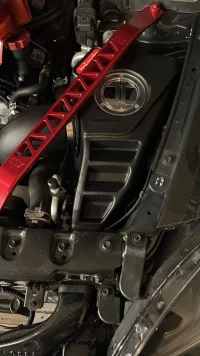
JB4 with EWG:
JB4 very easy install. Just lay it out first and think about wire management. Don’t just hook them up and not think about the routing. You can, but it will look like a box of spaghetti attacked your engine bay. There are many routes, but some are better than others. I used 1/4 and 3/8 conduit for all wires to give it a more polished look. Then zip tied them into place. I used 3M velcro style command strips to attach the JB4 and bluetooth controller. Note the small instruction on which direction to place the BT controller. Simple connect and ensured firmware update and enabled windshield wiper functionality.
EWG: I turned this into a PITA unnecessarily. My bad but live and learn. I should have installed them when I did the aFe intakes. Would have saved a lot of time. I had read somewhenre that you could reach them from the bottom fairly easy. Not on a 22!!!!! I removed the splash pan while doing the exhaust. I was able to do the driver side with much difficulty. Impossible to do the passenger from the bottom. So today I removed the passenger intake and ducting to access the waste gate. No problem. I then removed just the ducting on the drivers side (Not the intake box) and had clear access to the waste gate plug. Unplugged and reinstalled/rerouted the drivers EWG and make it more polished. Programmed proper EWG settings based on the JB4tech forums.
MBRP active exhaust for 22/23 models
Once again easy install. Since my car has so little miles the bolts came off very easily. Uninstall from rear to front. Install front to back. Leave bolts loose at first until all parts are ”hanging” from the car. then tightened from front to back. I cleaned the gaskets and then reinstalled using exhaust grease on both sides of the gaskets. The gaskets are smooth, not rippled so I wanted to remove any previous grime/grease and ensure a solid seal. I installed the exhaust as far to the rear as possible and they still only extend about 1in into the OEM chrome tips. The noise inside is noticeably louder than stock. I love the sound outside but still hoping to find a solution to increased interior noise levels. Possible solutions are clamp on a 2-3inch extension pipe and/or wait for the MBRP exhaust tips that David at K8 said are in development. Active exhaust electrical installation. It’s very straightforward and simple. Just be sure (as mentioned in the directions) the valve is open during installation.
As a side note a friend is going to powdercoat my chrome tips gloss black to match the rest of the car.
I’d like to acknowledge the following folks for their online YouTube and forum help during this process. This info is to stinger maintenance and upgrades as WebMD is to Healthcare. Without their help I never would have attempted this:
StingerForum
This place is a wealth of knowledge. Lots of been-there-done that, how to, tips and tricks. THANK YOU! ! I hope this post helps and motivates others to attempt projects they might not have attempted otherwise.
JB4 tech website
So much info over there specifically for the JB4. I went though a large chunk of it before my purchase.
Mark at Performance Auto and JulianwithanX spark plugs
I did this a few weeks ago in prep for the JB4
KJ Lifestyle and Julian withanX
aFe intakes and JB4 install
Stinger_gt21
front number removal (I’m a pro now)
Kia stinger front bumper removal (2018-2022)
aFe power
high quality intake install video
aFe POWER 2018-22 Kia Stinger V6 3.3L (tt) Takeda Intake Install #kiastinger #takeda #afeintake
First Coast Garage
EWG wires
Kia Stinger 3.3 JB4 EWG install
KDM_Curt and Stung_by_Kia (Eric)
VT snorkels and lit kit
Installing LED "Lit Kit" Big Mouth Intake Snorkels! (2022 Stinger Bumper Removal)
Velossa Tech Big Mouth Gen4 with LIT - step by step install - Kia Stinger
MBRP exhaust
Dave at K8 on these forums and via email
Other various folks since the release of the new active exhaust for 22+
TWN2RBO on YouTube
Various install videos, motivation and all around positivity. Keep up the good work.
There are plenty of other videos out there that are helpful, but these are the primary ones I referenced and watched multiple times before attempting this project.
I looked at this as a big (although expensive) Lego set. It just takes time. If you get tired take a break and reattack later. Better to go slow and not make a mistake than to rush and miss a step, not tighten a clamp or fail to connect an electrical connection. That’s why I spent today doing clean up items and making sure everything is solid before tackling the FMIC this weekend. I know this will result in some work being reaccomplished, but I know the system so well now I’m not worried at all. Learning from my mistakes should pay dividends this weekend.
I give up trying to rotate pics correctly.
UPDATE: I forgot to mention have ahead lamp on hand. I saw one person had the odelphi headlamp so I purchased one. Now that it’s getting darker earlier this helped when the install went longer than I expected. im really glad I had one. For some of those tighter spots in the engine bay.
Attachments
-
 89985CD6-8080-45F3-997B-3A6CB5DB9C64.webp231.4 KB · Views: 24
 -
 37E9317E-E2B6-4086-B3D4-2E42ABFF0816.webp221.4 KB · Views: 24
 -
 31504B60-D6D5-4D47-8293-094CC4DE1F36.webp210.4 KB · Views: 13
 -
 E6AFFFB4-F0A1-4950-956C-7F68E74DF2F5.webp219.3 KB · Views: 12
 -
 B1743A61-D54F-414C-ABD1-96CD2877909C.webp340.7 KB · Views: 13
 -
 EA0A684B-DF7F-4400-BCF3-6A410F4CB522.webp257.6 KB · Views: 13
 -
 106E6562-ECF8-4826-856C-822208159BBB.webp230.2 KB · Views: 12
 -
 8235EF55-D52B-4439-AC7A-4E510009C38D.webp186.9 KB · Views: 11
 -
 32CA8FD6-9D6A-4530-B83D-FC1F4A4E30EC.webp359.3 KB · Views: 11
 -
 0AF947FB-88B2-4389-A1FC-4A5FE21439E0.webp375.4 KB · Views: 14
 -
 AA39CC73-6A3D-4D41-8874-A21B811972BE.webp166.4 KB · Views: 16
Last edited:


")