You are using an out of date browser. It may not display this or other websites correctly.
You should upgrade or use an alternative browser.
You should upgrade or use an alternative browser.
Rokblokz Tire Splash Guards
- Thread starter NIU_Huskies
- Start date
65RivieraGS
Member
- Joined
- Jul 16, 2020
- Messages
- 60
- Reaction score
- 38
- Points
- 18
That mesh idea is great! After washing my car , I was wondering how best to prevent larger things from flying through there. SS mesh is a great idea. I was thinking about Aluminum metal screen for windows, but was wondering if it would just tear or otherwise loose shape to easily. SS is the better approach.
Other question -- Where is a good source for OEM touch-up paint? I forgot to negotiate a bottle when I bought my car . FOUND THE THREAD ...
Other question -- Where is a good source for OEM touch-up paint? I forgot to negotiate a bottle when I bought my car
Last edited:
These look pretty cool and looks to be compatible with after market side skirts. Had to remove my oem mud guards in order to install side skirts. Curious if anyone has installed these that have side skirts.
______________________________
Hockster
Stinger Enthusiast
These look pretty cool and looks to be compatible with after market side skirts. Had to remove my oem mud guards in order to install side skirts. Curious if anyone has installed these that have side skirts.
Hope to install my maxton side skirts this weekend.
mhal8876
Stinger Enthusiast
Nice! wanna see this. don't forget the picsHope to install my maxton side skirts this weekend.
From interior to exterior to high performance - everything you need for your Stinger awaits you...
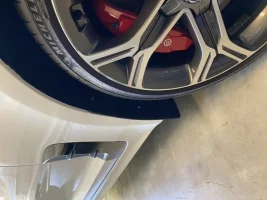
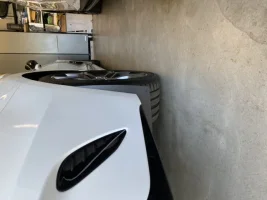
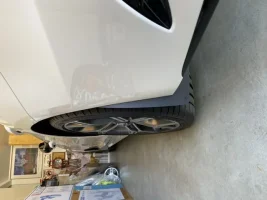
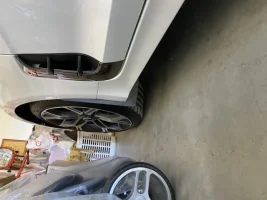
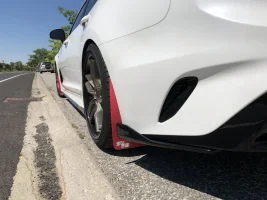
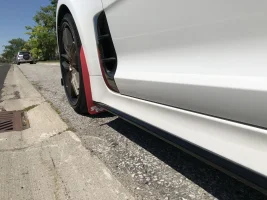
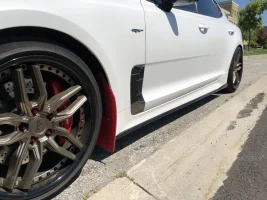
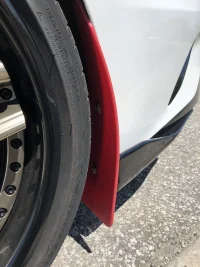
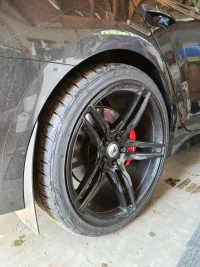
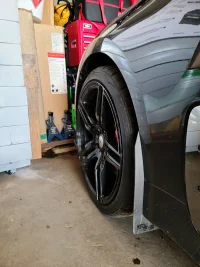
Making me regret getting black/black instead of red/white. Amazing look!Just installed my Rokblokz for anyone interested in seeing what they look like with side skirts - have the M&S.
I have a 2018 Stinger so I didn't need the new additional clips as there was already a screw thread for the bottom hole.
View attachment 48895View attachment 48896View attachment 48897View attachment 48898
Making me regret getting black/black instead of red/white. Amazing look!
I had to google that colour combo on white cars to see how it would look before making a decision. The other choice was white/black, but white would get dirty very quick.
Agreed, as cool as it'd be, it'd also be dirty 10 seconds into driving post wash, ha! I do really like the black/black look as it meshes with the other black elements well.I had to google that colour combo on white cars to see how it would look before making a decision. The other choice was white/black, but white would get dirty very quick.
jazzdabb
Active Member
The red lugnuts are a nice touch.I had to google that colour combo on white cars to see how it would look before making a decision. The other choice was white/black, but white would get dirty very quick.
______________________________
From interior to exterior to high performance - everything you need for your Stinger awaits you...
65RivieraGS
Member
- Joined
- Jul 16, 2020
- Messages
- 60
- Reaction score
- 38
- Points
- 18
Hi ... Firstly, this is a SPECTACULAR IDEA!!! The TEMPLATE was great ... I presume that it prints on a standard US 8x11 paper?Here's the template
Your photo looks like you used perforated steel plate and not a woven stainless steel mesh. I think that the mesh is a nice alternative. What size of mesh did you use? And how much (sq inches) was needed? The mesh size defines the wire diameter: Mesh size 1 = 2mm thick wire and nearly a one inch opening (obviously too large!) and Mesh size 400 has a 0.018mm wire with 0.0455mm (0.018inch) square opening ... obviously too small.
In you experience, (1) what mesh size did you use; and (2) ARE YOU HAPPY with the results?! For me HAPPINESS is (1) the paint isn't marred by debris flying through the vent; (2) the mesh maintained its integrity (no holes punctures. Lastly, how much mesh (sq in) did you need to use?
Thank you in advance for your reply. ---I'm new to these boards ,so send "PM" (personal message) doesn't appear available to me.
rdromance
Active Member
I used a Toris SS304 stainless steel mesh I found on Amazon. Worked perfectly.Hi ... Firstly, this is a SPECTACULAR IDEA!!! The TEMPLATE was great ... I presume that it prints on a standard US 8x11 paper?
Your photo looks like you used perforated steel plate and not a woven stainless steel mesh. I think that the mesh is a nice alternative. What size of mesh did you use? And how much (sq inches) was needed? The mesh size defines the wire diameter: Mesh size 1 = 2mm thick wire and nearly a one inch opening (obviously too large!) and Mesh size 400 has a 0.018mm wire with 0.0455mm (0.018inch) square opening ... obviously too small.
In you experience, (1) what mesh size did you use; and (2) ARE YOU HAPPY with the results?! For me HAPPINESS is (1) the paint isn't marred by debris flying through the vent; (2) the mesh maintained its integrity (no holes punctures. Lastly, how much mesh (sq in) did you need to use?
Thank you in advance for your reply. ---I'm new to these boards ,so send "PM" (personal message) doesn't appear available to me.
65RivieraGS
Member
- Joined
- Jul 16, 2020
- Messages
- 60
- Reaction score
- 38
- Points
- 18
Thank you.I used a Toris SS304 stainless steel mesh I found on Amazon. Worked perfectly.
G
G-220370
[QUOTE = "rdromance, 게시 : 300855, 회원 : 127"]
Amazon에서 찾은 Toris SS304 스테인리스 스틸 메쉬를 사용했습니다. 완벽하게 작동했습니다.
[/ 인용문]
There's something in the shape of a column of different sizes of rubber..이거의 목적을 말씀해 주시겠습니까? 크기가 다르기 때문에 용도가 무엇인지 모르겠습니다.
Amazon에서 찾은 Toris SS304 스테인리스 스틸 메쉬를 사용했습니다. 완벽하게 작동했습니다.
[/ 인용문]
There's something in the shape of a column of different sizes of rubber..이거의 목적을 말씀해 주시겠습니까? 크기가 다르기 때문에 용도가 무엇인지 모르겠습니다.
Sorry to drag up an old post, but how far out does the edge of the flaps poke from the face of the wheel? Tossing up between slimz and Original but not sure how far past the wheel face they sit.Just want to add, bought the Rokblokz originals 2 weeks ago and installed last night. Went without a hitch and they included all hardware needed (including the 2 nylon screw clips for the front bottom hole). Great quality and I love the extra coverage they provide over OEM Kia ones.
From interior to exterior to high performance - everything you need for your Stinger awaits you...
Hockster
Stinger Enthusiast
namja
Stinger Enthusiast
So... I just installed mine. But I can't seem to understand how there's leeway since you just screw into the 2 or 3 holes. Unless if you're referring to the fact that the holes are wider than the provided screws?I intentionally put mine further out for extra protection, especially on the rear. You have some leeway on where they're placed.
View attachment 51783View attachment 51784
Hockster
Stinger Enthusiast
So... I just installed mine. But I can't seem to understand how there's leeway since you just screw into the 2 or 3 holes. Unless if you're referring to the fact that the holes are wider than the provided screws?
Basically, mine had a bit of room to position them as I recall. But if wanted perfectly flush you'd probably need to make your own holes.
namja
Stinger Enthusiast
Basically, mine had a bit of room to position them as I recall. But if wanted perfectly flush you'd probably need to make your own holes.
"bit of room" - like maybe 1-2cm of leeway? At least that's what it seems like for me.
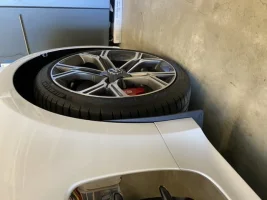
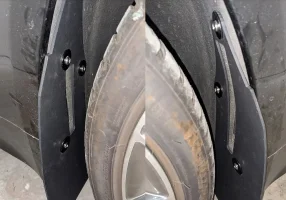
Would you mind taking a picture of the front wheel wells (both sides)? I never noticed the inserts were located in different locations until now!
edit: here's mine... the driver side top screw placement looked weird with the spacer outside of the liner, so i just tucked it in behind the liner, just for aesthetic purposes...
Last edited:
Hockster
Stinger Enthusiast
I put the spacers under the liners as well.
From interior to exterior to high performance - everything you need for your Stinger awaits you...


