Badge Removal Tips

kdrab206

Newish Member
Joined
Jan 30, 2019
Messages
7
Reaction score
14
Points
3
Location
Delaware
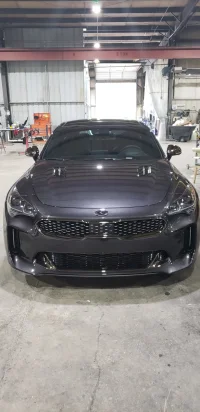
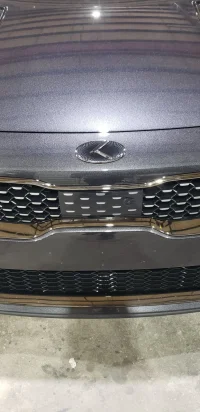
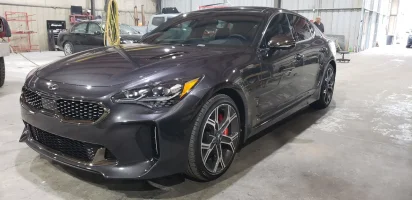
I removed the badges from the Stinger this past weekend and wanted to share my techniques. Please note that I take no responsibility for any damage you may do to your car during badge removal.

Preface
Take your time.
Absolutely no heat is needed to remove the badges.

Prep
Start by lightly cleaning the area around the badge and wiping dry with a microfiber towel. Next use painters tape and outline the badge. I was actually able to slide the tape under the badge a little (1/8") to protect the paint. Then spray a little Goo-Gone along the top edge of the badge.

Tools
  • I used 20lb fishing line. Instead of wrapping the fishing line around my fingers I used (2) pieces of 1" dia. dowel, about 4" long. Cut a length of finishing line (arms span), tape the line to the dowel, then wrap over itself a couple times.
  • Goo-Gone
  • Blue shop towels
  • plastic spreaders (3-pack)
Badge Removal
Get fishing line under the edge of the badge. Once the line is under the badge pull back towards yourself. Slowly work the line back and forth in a sawing motion. The Goo-Gone you sprayed in the first step should act as a lubricant to keep the line from sticking as you work through the adhesive. If the line gets stuck, gently work it back to free it and add more Goo-Gone. Should be able to work your way around the badge to the pins without too much trouble.

Next get your plastic spreaders, insert one on the left, one on the right and one at the top. Get your fishing line under the bottom of the badge and gently pry up until you can get a finger under. Gently push up to release the badge.

Adhesive Removal
Spray the adhesive with Goo-Gone and allow to absorb for a couple minutes. Use a small piece of the blue shop towel to remove the adhesive, a little at a time. Once the adhesive adheres to the towel discard it and use a clean piece.

Took me a couple hours to do the front and rear badges.

Hope that helps you with your installs.

Trevor
 
Nice detailed instructions thank you! Lots of members have used goo gone or the equivalent and have had success. Thanks for the tips!
 
Nice detailed instructions thank you! Lots of members have used goo gone or the equivalent and have had success. Thanks for the tips!
Now go to your box of badges that you have & get on with it....:p
 
______________________________
I've had success on other cars with using heat, using it to relax the adhesive and peel it off intact. I actually got the badge off the stock grill on my Subaru Liberty (Legacy for you lot outside of Australia) in such a way that I was able to stick it on the new grill without needing additional adhesive - and it's been there for close on 6 years now without any new adhesive needed!
 
I've had success on other cars with using heat, using it to relax the adhesive and peel it off intact. I actually got the badge off the stock grill on my Subaru Liberty (Legacy for you lot outside of Australia) in such a way that I was able to stick it on the new grill without needing additional adhesive - and it's been there for close on 6 years now without any new adhesive needed!
Adhesive on the Stinger is very strong and requires a fair bit of work to get the badge to lift.
 
From interior to exterior to high performance - everything you need for your Stinger awaits you...
Adhesive on the Stinger is very strong and requires a fair bit of work to get the badge to lift.

Oh, it wasn't quick on the Liberty - took ages. I was just happy that the heat (applied with a hair drier, as I don't own a heat gun) worked. I was even more happy that I didn't need to do anything fancy to get the badge to stick on the new grill - less of an issue with the Stinger, as we're generally putting a new badge in place rather than putting the same badge somewhere else :)
 
KIA badge on the back was a bear to remove. The full backside is covered in adhesive tape plus there are two posts. Truly a PITA.

The small Stinger badge however came off no problem.
 
So I bought the vintage K logo set which are adhesive backed, no pegs like the E logo. Are you still supposed to remove the Kia badges and put these in place? Or just stick them over top? Probably the former I’m guessing or they will stick out too much. But I wanted to make sure before I undertake this project....
 
So I bought the vintage K logo set which are adhesive backed, no pegs like the E logo. Are you still supposed to remove the Kia badges and put these in place? Or just stick them over top? Probably the former I’m guessing or they will stick out too much. But I wanted to make sure before I undertake this project....

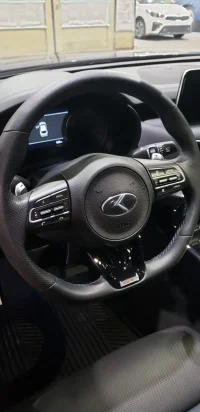
You are suppose to remove the OEM KIA badges for the K logos iirc. For the steering wheel emblem, I believe it's okay to just put it on top (I did it on mine, but you can't really tell). The front and back you would want to completely remove since it's very noticeable if you add it on top (I don't recommend this).

*edit - typo
 
______________________________
From interior to exterior to high performance - everything you need for your Stinger awaits you...
Yeah, I figured as much, the hood & trunk badges need to come off. Fun project for me this weekend! It does look like my hub cap overlays are truly overlays so I don't have to remove/replace those, and the steering wheel badge is also going over the top because I don't want to gouge anything trying to remove it where avoidable! I agonized over doing this for a long time, but finally decided I'm not doing it because of Kia shame, I just think their logos are so cheap looking on such a nice car!
 
Yeah, I figured as much, the hood & trunk badges need to come off. Fun project for me this weekend! It does look like my hub cap overlays are truly overlays so I don't have to remove/replace those, and the steering wheel badge is also going over the top because I don't want to gouge anything trying to remove it where avoidable! I agonized over doing this for a long time, but finally decided I'm not doing it because of Kia shame, I just think their logos are so cheap looking on such a nice car!

Totally agree with you on the looks of the logo... I took mine to a local body shop to do... they quoted me and charged me $40 to remove and install the new ones. I figured by the time I bought the tape, goo-gone, and my time $40 was a steal and they are known to do good work and I'm super happy with the work they did. :D (it was also pretty cold out, and I couldn't wait for it to warm up to do it myself lol )
 
@RedCal it looks great! I got the checkered black chrome front/rear badges, but the rest of the badge package is regular chrome--didn't know it would be like that. Not sure about it, may return the black chrome ones for the silver chrome, so it's all matchy matchy.
 
@RedCal it looks great! I got the checkered black chrome front/rear badges, but the rest of the badge package is regular chrome--didn't know it would be like that. Not sure about it, may return the black chrome ones for the silver chrome, so it's all matchy matchy.
Pics ....
 
@RedCal it looks great! I got the checkered black chrome front/rear badges, but the rest of the badge package is regular chrome--didn't know it would be like that. Not sure about it, may return the black chrome ones for the silver chrome, so it's all matchy matchy.

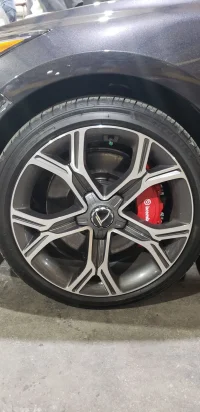
Mine was the same... I don't mind the regular black for the steering wheel (that I haven't done yet) but I don't plan on using the wheel badges, I did a carbon wrap on the centre cap of the summers, and a red one on my winter wheels
 
From interior to exterior to high performance - everything you need for your Stinger awaits you...
@RedCal it looks great! I got the checkered black chrome front/rear badges, but the rest of the badge package is regular chrome--didn't know it would be like that. Not sure about it, may return the black chrome ones for the silver chrome, so it's all matchy matchy.
I decided to keep the black chrome front badge and the chrome on the steering wheel and the wheels. The black chrome and checkered just looks too good, especially on the GTs!
 
______________________________
20200825_130928.webp20200825_130938.webp20200825_131753.webp20200825_131816.webp20200825_131927.webp
 
I just did my front and rear badges... they weren't terrible.. the worst part was removing the residual 3m tape from behind the badges. That took forever and goo gone didn't really seem to work.

3m makes an adhesive remover that may work better.
 
WD 40 worked better than goo gone. I had to wash the area with detergent to remove the residual WD 40, then re wax the area after the new badge was installed.
 
replaced the rear badge this weekend. Waited for a warm day, but didn't use any heat. Used a thin rewards card and fishing line. Get the line under the corner, then use the card to apply just a bit of force so the line can move back and forth without rubbing the paint hard. Work gently around all four sides, then it pops off. Let goo gone soak for 10 sec, scrape gently with card, repeat about 5 times. I was left with a bit of a mark on the clearcoat. Don't know if I caused it or was there before, but some polishing compound cleaned it up perfect. Some clear silicone in the holes. Take your time lining up the stencil. Nothing is square or flat so it's not easy. Also not obvious how to cover both holes with the letters, just take your time and check alignment before pressing it down. Looks perfect. Thanks to all for the advice here.
 
From interior to exterior to high performance - everything you need for your Stinger awaits you...
Back
Top