
antonini311
Active Member
I had to hit the freeway the other day. I'm hardly ever driving now, thanks to the "Safer at home" and my bad luck...
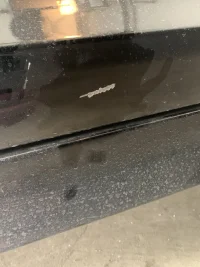
A giant rock or something skipped off the freeway and hit the lower strip of my driver's door panel. We never even saw anything, just heard a loud thunk. My hopes that it was just a hit to the undercarriage were dashed when I got home and saw a 1.5in strip that was down to the bare metal. So upsetting. I want to fix it, but body shops are quoting $600 just for that. Meh! I think it's too much work for me to try and tackle myself, given it removed all paint in that area.
If I choose to forego body work for now and save the $$, is there anything I should do to the area to assure it doesn't get worse, or more paint starts to peel?
Thanks

 Yours is on a downward facing surface and down low. Aside from the unlucky hit in the first place, that is lucky.

