Seeking How To Q : Installing the Kia Motors front badge instead of the E badge?

GT2inSeattle

Member
Joined
Jul 15, 2018
Messages
61
Reaction score
31
Points
18
Hey there

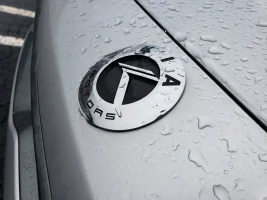
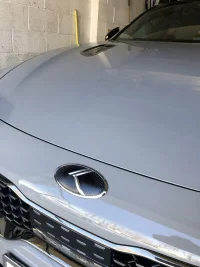
I ordered this badge to put on the nose of my stinger. It's the "Kia Motors" emblem instead of the E-badge.


However I didn't realize until after I ordered it that it's placement and the pegs in the back of it might be different than the E-badge.. Can someone point me to a link, video, pictures that show how to install this one? I'm going to probably take it to a local shop to have it done (I have zero business being near heat guns and car body tools - hey I know my limitations) but I'd like to give them as much reference information as possible.

Thanks for your help.
 
Pop the peg off and stick the badge on. Takes 10 seconds.
 
Nice choice! I 'd put that one on if I were going to swap badges permanently.
 
______________________________
Pop the peg off and stick the badge on. Takes 10 seconds.

The problem is there's only two pegs on this one as compared to three on the E-badge.. since I've never seen the E-badge up close I don't know if the space and placement are similar or not. Which means I don't know if I have to cut them off, plug three holes in the nose compared to just one (from the videos of the E-badge that I've watched) etc.

EDIT - I see what you're referring to.. just remove the pegs completely, center and stick it on.. thanks..

Your edit is correct.

And no need to seal up any holes on the front.
 
Last edited:
From interior to exterior to high performance - everything you need for your Stinger awaits you...
Hey there

I ordered this badge to put on the nose of my stinger. It's the "Kia Motors" emblem instead of the E-badge.

OEM Kia Motors Badge in Chrome - Kia Stinger dot com

However I didn't realize until after I ordered it that it's placement and the pegs in the back of it might be different than the E-badge.. Can someone point me to a link, video, pictures that show how to install this one? I'm going to probably take it to a local shop to have it done (I have zero business being near heat guns and car body tools - hey I know my limitations) but I'd like to give them as much reference information as possible.

Thanks for your help.
There is a "DIY" thread for all such advise if you go up to the forum Tab and have a look for the heading you will find it in there.
 
There is a "DIY" thread for all such advise if you go up to the forum Tab and have a look for the heading you will find it in there.

Thanks! When I looked there I found a PDF that gives the overview and pics of the installation.. This should be perfect and seems to cover exactly what I need.
 
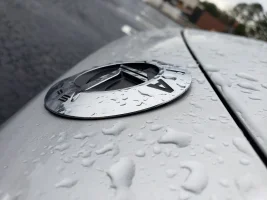
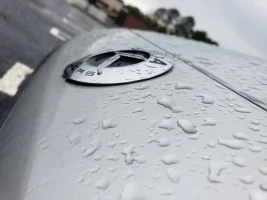
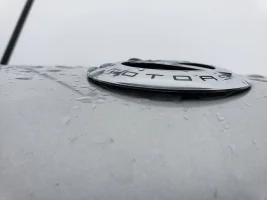
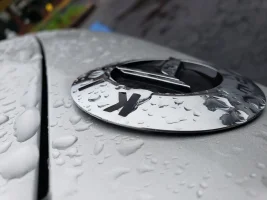
Heads up, I have that same badge, before you go through with it though just know that it won't sit flush. The area it sits on has a radius to it and the OEM badge matches that curve perfectly, however the badge that you have is flat so only the middle will make contact and the tops and bottom will actually sit off of the surface. I layered some 3M tape to try to take up the gap, but it's kind of awkward. No one will probably notice except you will know.
 
Heads up, I have that same badge, before you go through with it though just know that it won't sit flush.

That's VERY interesting.. thank you.. I'll talk to the owner of the shop I'm reaching out to do this work for me and see what he has for ideas. Much appreciated.
 
If you're the type that likes things to fit perfectly you may not want this particular badge. I don't really see what could be done to make it sit flush. Even if you 3D print a curved shim to fill the gaps (which I thought about since my brother in law 3D prints for a living), the badge will still not be flush against the body.

20190311_163006.webp 20190311_162900.webp 20190311_162917.webp 20190311_162939.webp 20190311_162947.webp 20190311_163001.webp
 
______________________________
From interior to exterior to high performance - everything you need for your Stinger awaits you...
If you're the type that likes things to fit perfectly you may not want this particular badge. I don't really see what could be done to make it sit flush. Even if you 3D print a curved shim to fill the gaps (which I thought about since my brother in law 3D prints for a living), the badge will still not be flush against the body.

View attachment 21126 View attachment 21128 View attachment 21129 View attachment 21130 View attachment 21131 View attachment 21132

That's so strange. I have the blue version and it doesn't sit anything like that. I guess more than the colors make them different.
 
Yea I'm looking at the pics for the badge itself and those photos show that Chrome badge looking pretty darn flush with the car too..
 
I can't guarantee the one you are buying is the same one I have, but mine sits flush - it was designed for that area so it should. The slight gap you see is uniform all the way around.

upload_2019-3-11_18-13-28.webp
 
The pictures in the link for the chrome badge are showing them at their best angle so they look flush, I know because I was one of the first to buy that badge and share pictures so the third picture with it on the silver stinger is mine. It looks flush in that picture but as you can see compared to the pictures I posted here it looks a lot different close up.
 
if you laid it over a round pipe and applied pressure could you make it bend enough to fill the gap ??Probably would need a 2" diameter pipe to hold the proper compound curve ...................
 
From interior to exterior to high performance - everything you need for your Stinger awaits you...
if you laid it over a round pipe and applied pressure could you make it bend enough to fill the gap ??Probably would need a 2" diameter pipe to hold the proper compound curve ...................

Nope its plastic.
 
______________________________
Nope its plastic.
thats better , heat it hot water then try it over the pipe , the trick to get it to stay curved will be to let it cool completely while holding the form .................
 
If you're the type that likes things to fit perfectly you may not want this particular badge. I don't really see what could be done to make it sit flush. Even if you 3D print a curved shim to fill the gaps (which I thought about since my brother in law 3D prints for a living), the badge will still not be flush against the body.

View attachment 21126 View attachment 21128 View attachment 21129 View attachment 21130 View attachment 21131 View attachment 21132
@Flameangel you maybe want to rethink purchasing this badge . Ps. Thanks for the heads up guys.
 
From interior to exterior to high performance - everything you need for your Stinger awaits you...
Back
Top