Tee
Member
- Joined
- Oct 7, 2022
- Messages
- 35
- Reaction score
- 34
- Points
- 18
Let me start this out by saying that these definitely are not up to the same quality as Chris and his CK71 product and I am in no way trying to cut into his production/profits. I just wanted to share this project with others.
Overall cost for this project was $100 for the Switchback LEDs and ~$15 for the various glues and silicone.
I started off with a universal switch strip from Diode Dynamics. You will need the 9in variant if you want to do this yourself. The nice thing about these is you can cut off about 20% of the total strip before a LED driver replacement is needed. Here is the one I used. hd-led-semi-flex-strip-single.html
The prep for this is very minimal as it is just removing the vents as you would if you were doing the original CK71 install. I used this video as my research basis at the beginning.
https://www.youtube.com/watch?v=mlZKH4LpfW8&t
I removed the vents and got to removing the silver inlay. They are easy to remove as it is just a couple of clips holding them in.
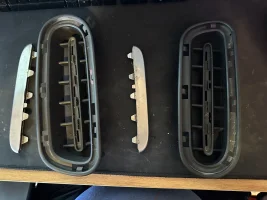
You'll notice that there are some guiding tabs inside the channel. They'll need to be dremeled out.
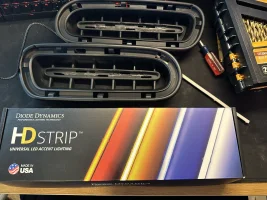
After you Dremel them out, you'll need to drill a hole and then widen with the Dremel to pass the connector through. Make sure the hole is as far top as you can go on the part of the vent that has a more rectangular area rather than a semicircle area. After you do that you'll be able to pass the connector through and start test fitting the strip and cutting to size. The strip will also have some manufacturing tabs you can just use a side cutter to snip off.
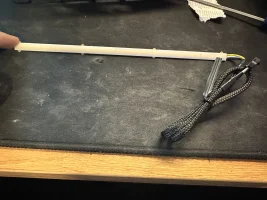
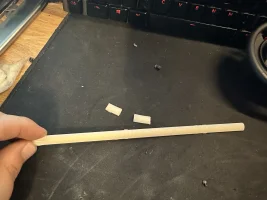
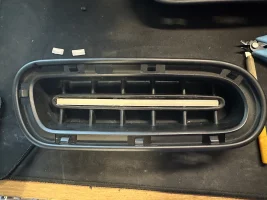
I used some gel superglue to hold the strip down initially as it had a tendency to pop itself up and out of the channel. This is where I'll recommend some changes to how I did mine. I used some E6000 to weather proof and protect the strip as it dries completely clear. However, you'll want to make sure you tape up the back of the vent to prevent air bubbles from forming from the adhesive leaking through the holes. I assumed the glue would be thick enough that it wouldn't leak through. Also, when you are applying the E6000 into the channel, make sure you go a little at a time and SLOW. I got overly excited and applied to much at once causing it to leak onto the edges at times. I tried my best to clean it up but it can still be seen if you're looking for it. Applying too much at once will also cause the glue to roll over on itself creating more air bubbles.

After the E6000 dried, I flipped it over and focused on the other side for more weather proofing and stress relief for the cable. I used some adhesive/caulking clear silicone for this side.
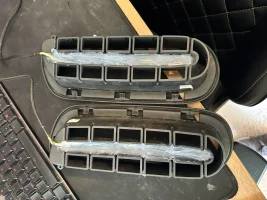
After you get to this point the install is the same as any other CK71 Kit as they use the same drivers. I'll note that the driver that these came with also had a white wire designated for the white lights to be at 50% brightness but I passed on using that wire and just used the red (white positive), yellow (amber positive) and black (ground). I used CK71's guide on his website to wire them up.
Here is the final product!

Overall cost for this project was $100 for the Switchback LEDs and ~$15 for the various glues and silicone.
I started off with a universal switch strip from Diode Dynamics. You will need the 9in variant if you want to do this yourself. The nice thing about these is you can cut off about 20% of the total strip before a LED driver replacement is needed. Here is the one I used. hd-led-semi-flex-strip-single.html
The prep for this is very minimal as it is just removing the vents as you would if you were doing the original CK71 install. I used this video as my research basis at the beginning.
https://www.youtube.com/watch?v=mlZKH4LpfW8&t
I removed the vents and got to removing the silver inlay. They are easy to remove as it is just a couple of clips holding them in.

You'll notice that there are some guiding tabs inside the channel. They'll need to be dremeled out.

After you Dremel them out, you'll need to drill a hole and then widen with the Dremel to pass the connector through. Make sure the hole is as far top as you can go on the part of the vent that has a more rectangular area rather than a semicircle area. After you do that you'll be able to pass the connector through and start test fitting the strip and cutting to size. The strip will also have some manufacturing tabs you can just use a side cutter to snip off.


I used some gel superglue to hold the strip down initially as it had a tendency to pop itself up and out of the channel. This is where I'll recommend some changes to how I did mine. I used some E6000 to weather proof and protect the strip as it dries completely clear. However, you'll want to make sure you tape up the back of the vent to prevent air bubbles from forming from the adhesive leaking through the holes. I assumed the glue would be thick enough that it wouldn't leak through. Also, when you are applying the E6000 into the channel, make sure you go a little at a time and SLOW. I got overly excited and applied to much at once causing it to leak onto the edges at times. I tried my best to clean it up but it can still be seen if you're looking for it. Applying too much at once will also cause the glue to roll over on itself creating more air bubbles.

After the E6000 dried, I flipped it over and focused on the other side for more weather proofing and stress relief for the cable. I used some adhesive/caulking clear silicone for this side.

After you get to this point the install is the same as any other CK71 Kit as they use the same drivers. I'll note that the driver that these came with also had a white wire designated for the white lights to be at 50% brightness but I passed on using that wire and just used the red (white positive), yellow (amber positive) and black (ground). I used CK71's guide on his website to wire them up.
Here is the final product!

Last edited:


