
robz32
Texas Stinger Swarm
Alright guys as promised. Here is the how to guide to replace your reverse halogen bulbs with LED's.
Here are the tools you will be using.
2- Plastic panel remover tools (A thin one and a medium one, can use only one, but just in case you need to pry a bit harder)
1- Ratchet
1- 10mm Socket
1- Needle nose plier
1- Ratchet extension
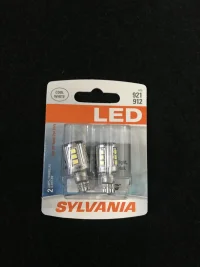
1- Pair of 921 base T10 LEDs (I purchased mine form HERE)

Light Panel Removal
First you need to open the hatch
After the hatch is fully open, you need to identify the two covers that will give you access to the connectors and nuts holding the light panel to the hatch.
They look like this.


After you have identified the two cover (one for each side). You will the take your thin panel remover tool and insert it in the small opening on the cover.
NOTE: It requires some force to pop it out. You can help it with the medium panel remover.
Having taken the cover off. You should now have access to the light harness and the nuts holding the light bar to the Hatch.
Should look like this

Proceed with your ratchet, extension and 10mm Socket, and remove the three (3) nuts that hold the light bar on EACH SIDE. (Circled in RED)


After you have removed the nuts on both sides (Total of six nuts).
You can now proceed to disconnect the two connectors on each side.
Once the connectors have been unplugged, you can now proceed with the removal of the light bar.
To do so you will to get you plastic panel remover too and insert it on to the side of the light bar.

You feel the light bar starts coming out, apply some force to pry it out.
NOTE: DO NOT!!!...I repeat, DO NOT!! pull the light bar completely out as you will break it!!
Now that you have one side out, you can move on to the next side.

You will notice that this side will come out a bit easier. Once the other side is out, you will notice the center pops out with the rest of the light bar.
Do not worry the plastic panel remover tool will not scratch your paint as the tool is plastic and you do not need much force to pry it out.

After making sure the light bar is completely loose, you can now proceed with the removal.


Once the light bar is completely out of the car, you will need to identify the rever light bulb socket.
HINT: the one at the bottom of the photo.

Once the socket has been identified, you will then use you needle nose pliers and turn the socket a quarter of a turn to make it loose.

Then, with the socket loosen, you can pull the socket out.

NOTE: I noticed that if you cut the foam covering the cable, a little, it will make it a lot easier to pull the socket out and it will also make installation of the LED much easier.
Now with the socket out, you can proceed and pull the halogen bulb out and install you LED bulb

Once the LED has been installed you can proceed and out the socket back in place and turn it until its secured.
NOTE: Notice how I cut the foam just a little to expose a bit more wire, so I can handle the socket more comfortable. No the additional exposed wiring will not interfere with the re installation of the light bar.
Once you have done one side you can repeat the same process on the other.
Congratulations you have sucessfully installed the LED's on your reverse lights. Now follow the step of removal backwards in order to re install the light bar.
NOTE: Be very careful when installing the light bar, if you are needing to apply too much force STOP and make sure everything is lining up correctly. The light bar should, literally fall into place when everything is lined up. All you will need to do is push it a bit so that it clips back in to the holes.
Here are some comparison shots
LED Left, Halogen Right

Close up

Both LEDs. Big difference.

That is all for now guys hope you find this guide useful.
P.S Sal I tried posting to the "How To" forum but it wouldn't let me. Feel free to move.
Rob
Here are the tools you will be using.
2- Plastic panel remover tools (A thin one and a medium one, can use only one, but just in case you need to pry a bit harder)
1- Ratchet
1- 10mm Socket
1- Needle nose plier
1- Ratchet extension
1- Pair of 921 base T10 LEDs (I purchased mine form HERE)
Light Panel Removal
First you need to open the hatch
After the hatch is fully open, you need to identify the two covers that will give you access to the connectors and nuts holding the light panel to the hatch.
They look like this.
After you have identified the two cover (one for each side). You will the take your thin panel remover tool and insert it in the small opening on the cover.
NOTE: It requires some force to pop it out. You can help it with the medium panel remover.
Having taken the cover off. You should now have access to the light harness and the nuts holding the light bar to the Hatch.
Should look like this
Proceed with your ratchet, extension and 10mm Socket, and remove the three (3) nuts that hold the light bar on EACH SIDE. (Circled in RED)
After you have removed the nuts on both sides (Total of six nuts).
You can now proceed to disconnect the two connectors on each side.
Once the connectors have been unplugged, you can now proceed with the removal of the light bar.
To do so you will to get you plastic panel remover too and insert it on to the side of the light bar.
You feel the light bar starts coming out, apply some force to pry it out.
NOTE: DO NOT!!!...I repeat, DO NOT!! pull the light bar completely out as you will break it!!
Now that you have one side out, you can move on to the next side.
You will notice that this side will come out a bit easier. Once the other side is out, you will notice the center pops out with the rest of the light bar.
Do not worry the plastic panel remover tool will not scratch your paint as the tool is plastic and you do not need much force to pry it out.
After making sure the light bar is completely loose, you can now proceed with the removal.
Once the light bar is completely out of the car, you will need to identify the rever light bulb socket.
HINT: the one at the bottom of the photo.
Once the socket has been identified, you will then use you needle nose pliers and turn the socket a quarter of a turn to make it loose.
Then, with the socket loosen, you can pull the socket out.
NOTE: I noticed that if you cut the foam covering the cable, a little, it will make it a lot easier to pull the socket out and it will also make installation of the LED much easier.
Now with the socket out, you can proceed and pull the halogen bulb out and install you LED bulb
Once the LED has been installed you can proceed and out the socket back in place and turn it until its secured.
NOTE: Notice how I cut the foam just a little to expose a bit more wire, so I can handle the socket more comfortable. No the additional exposed wiring will not interfere with the re installation of the light bar.
Once you have done one side you can repeat the same process on the other.
Congratulations you have sucessfully installed the LED's on your reverse lights. Now follow the step of removal backwards in order to re install the light bar.
NOTE: Be very careful when installing the light bar, if you are needing to apply too much force STOP and make sure everything is lining up correctly. The light bar should, literally fall into place when everything is lined up. All you will need to do is push it a bit so that it clips back in to the holes.
Here are some comparison shots
LED Left, Halogen Right
Close up
Both LEDs. Big difference.
That is all for now guys hope you find this guide useful.
P.S Sal I tried posting to the "How To" forum but it wouldn't let me. Feel free to move.
Rob
Last edited:


 .
.

