Hawk853,
Please post up with some pictures when you get them installed. This is the first car where most of my "cosmetic"
mods are done for the interior.
A little more to the install than I was expecting. One of those situations where the screws are made inaccessible by over lapping parts and panels. I figured the switch housings would be removable by simply removing the airbag. Nope.
Whole wheel has to come off.
1. Airbag (disconnect battery ground first)
2. Wire harnesses (two little screw drivers to simultaneously pry up and release purple and pink plug retaining pins), plus white and black plugs.
3. Wheel 21mm (36ft•lbs) has lock tight, so electric or air impact will save time.
4. Remove screws revealed by airbag
5. Remove screws for shifters and unsnap from wheel trim.
6. Remove rear trim
7. Remove 2 ea. hidden screws behind switch housings
8. Switch housings are snapped in place to the trim thats being swapped out, there are also 4 tiny Phillips screws that require patience and are begging to be stripped out.
9. Remove lower trim piece.
That’s from memory, so the order might be slightly different. It’s pretty intuitive once you know the whole wheel needs to come off. My right switch housing screw taps were blown out from the factory over torquing, but it’s pretty secure for now without them. Seems like a lot, but it’s easy as long as you have the right tools on hand.
There’s a few YouTube videos of people failing miserably to remove the airbag. I just used a 3mm t-handle allen wrench to push lock bars in: Left, Right, Bottom. Took about 10 seconds.
This guy shows how it’s done…

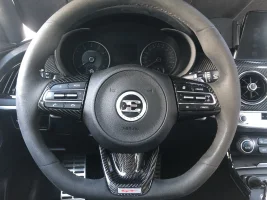
Finished product.

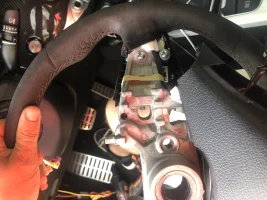
Here’s the two little rascals up top.

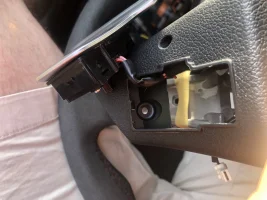
This shows the rear trim hiding the second screw.

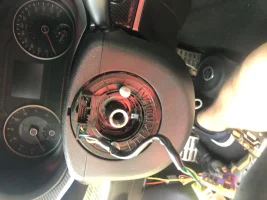
Caveat: Can’t for the life of me figure out why this photo keeps uploading sideways, but anyway… there’s a clock spring that maintains electrical contact while wheel is turning. Resist the urge to play with electrical hub that surrounds the steering shaft. If you break the clock spring you’re going to have a fun project ahead of you.

 sharkracing.com


