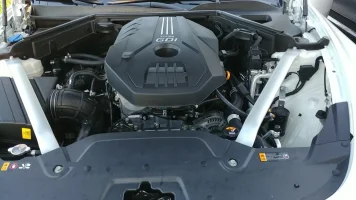
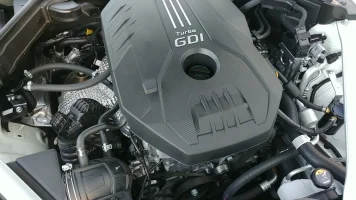
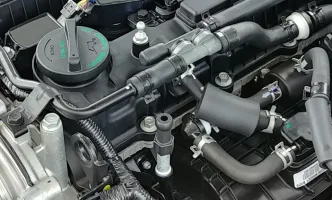
Hi all. I decided to try out dual catch cans on my 2.0T. I wanted to see if they would be effective for me. I have no experience with this, but have been researching, studying, and planning for some time. My objectives are:
(1) Retain the car's ability to relieve positive crankcase pressure as designed, which meant no plumbing redirection, minimizing bends, and retaining stock hose diameters where possible. If I even suspect this is compromised, I go back to stock
(2) Mount low: position the CC inlets downhill from the breather and PCV as much as possible
(3) Mount cold: position the CC canisters away from heat sources as much as possible while keeping hose runs reasonably short and direct
(4) Avoid permanent changes such as drilling
I used generic replicas of the Mishimoto compact, complete with what appears to be identical baffling and brass filter on the outlet. Build quality feels excellent in hand, with good material heft and clean machining/tapping. Both are 3-port, 2 in/1 out designs, and I simply plugged one inlet on each using the 3/8" NPT plug on the bottom, an am using them as 2 port units. Other supplies:
Pictures show how I mounted both sides. I'm trying out the current plumbing for now, and will probably re-route the outlet on the breather side with a regular 5/8 hose.
PCV side
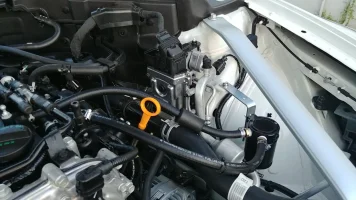
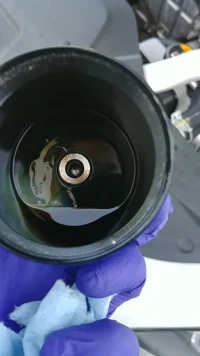
For the PCV side, I used what appears to be a mounting point for the 3.3T driver side air filter housing with a 3-4" corner brace. I installed a new 3/8" fuel line from the PCV to the inlet on the OCC, and used a brass union to connect more 3/8" line to the existing line on the intake manifold return, which opens to 1/2" at the manifold. I got lucky with this location because in addition to being away from heat sources, the inlet hose touches what appears to be a refrigerant line. Not sure if that actually helps, but the open can picture shows what this OCC caught in 180 miles!
I haven't noticed any issues running without a check valve on the return to intake manifold so far, but still plan to try one to replace the brass union leading into the manifold.
Breather/turbo side
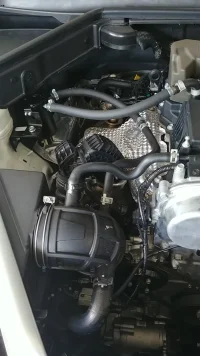
For the breather side, I used an existing threaded stud (m10 if I recall correctly) along the passenger side of the engine compartment with two smaller corner braces in a swiveling configuration. I removed the double-corner joint after the right angle hose coming out of the breather port, ran fresh 1/2" line from there to the inlet on the OCC, and then more 1/2" from the outlet into the remaining stock line which opens to 5/8" at the intake tube. In the picture, it looks like the bendy line returning to intake tract might be touching the exhaust manifold shield thing, but it's actually got more than 2" of clearance--which is actually not much different from stock. If I keep everything installed, I will probably still replace this with a 5/8" run from the OCC to the intake.
So far, no negative effects in terms of running or error messages. I have been getting better mpg than before, but that's probably because I have concentrated more on light throttle to keep boosting down until I install the check valve. I am really surprised at how much the PCV can caught in about a week of driving though. I am looking forward to checking the breather side, and the cleanliness of both outlets to see how much blow-by the cans are letting through.
On my objectives, I believe I accomplished mounting low and no drilling, did okay on mounting cold, and I'm feeling pretty good about the crank case still evacuating effectively. But, the whole thing is still on trial and may come right back out. I'll report back after some more miles. Let me know if any questions, and please share any insight.
Thanks and sorry about the long post.
(1) Retain the car's ability to relieve positive crankcase pressure as designed, which meant no plumbing redirection, minimizing bends, and retaining stock hose diameters where possible. If I even suspect this is compromised, I go back to stock
(2) Mount low: position the CC inlets downhill from the breather and PCV as much as possible
(3) Mount cold: position the CC canisters away from heat sources as much as possible while keeping hose runs reasonably short and direct
(4) Avoid permanent changes such as drilling
I used generic replicas of the Mishimoto compact, complete with what appears to be identical baffling and brass filter on the outlet. Build quality feels excellent in hand, with good material heft and clean machining/tapping. Both are 3-port, 2 in/1 out designs, and I simply plugged one inlet on each using the 3/8" NPT plug on the bottom, an am using them as 2 port units. Other supplies:
- 3/8" ID, 1/2" ID, and 5/8" ID fuel line (which I haven't used yet)
- brass 3/8" hose barbs (OCCs have 3/8" NPT thread and come with 1/2" ID barbs)
- brass 3/8" and 1/2" union
- drain plugs (one EZ filter and one generic)
- sealant tape, corner braces to use as brackets, assorted bolts, screws, nuts, washers, etc.
- titanium drill bits to modify corner braces
- 3/8" check valve for the return to intake manifold line (not installed yet)
Pictures show how I mounted both sides. I'm trying out the current plumbing for now, and will probably re-route the outlet on the breather side with a regular 5/8 hose.
PCV side

For the PCV side, I used what appears to be a mounting point for the 3.3T driver side air filter housing with a 3-4" corner brace. I installed a new 3/8" fuel line from the PCV to the inlet on the OCC, and used a brass union to connect more 3/8" line to the existing line on the intake manifold return, which opens to 1/2" at the manifold. I got lucky with this location because in addition to being away from heat sources, the inlet hose touches what appears to be a refrigerant line. Not sure if that actually helps, but the open can picture shows what this OCC caught in 180 miles!

I haven't noticed any issues running without a check valve on the return to intake manifold so far, but still plan to try one to replace the brass union leading into the manifold.
Breather/turbo side

For the breather side, I used an existing threaded stud (m10 if I recall correctly) along the passenger side of the engine compartment with two smaller corner braces in a swiveling configuration. I removed the double-corner joint after the right angle hose coming out of the breather port, ran fresh 1/2" line from there to the inlet on the OCC, and then more 1/2" from the outlet into the remaining stock line which opens to 5/8" at the intake tube. In the picture, it looks like the bendy line returning to intake tract might be touching the exhaust manifold shield thing, but it's actually got more than 2" of clearance--which is actually not much different from stock. If I keep everything installed, I will probably still replace this with a 5/8" run from the OCC to the intake.
So far, no negative effects in terms of running or error messages. I have been getting better mpg than before, but that's probably because I have concentrated more on light throttle to keep boosting down until I install the check valve. I am really surprised at how much the PCV can caught in about a week of driving though. I am looking forward to checking the breather side, and the cleanliness of both outlets to see how much blow-by the cans are letting through.
On my objectives, I believe I accomplished mounting low and no drilling, did okay on mounting cold, and I'm feeling pretty good about the crank case still evacuating effectively. But, the whole thing is still on trial and may come right back out. I'll report back after some more miles. Let me know if any questions, and please share any insight.
Thanks and sorry about the long post.


