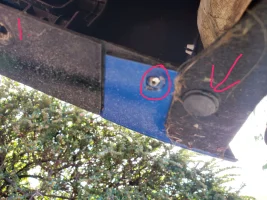
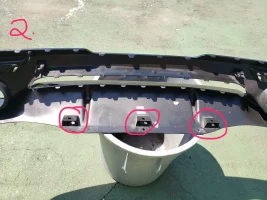
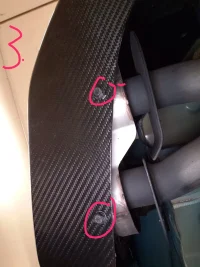
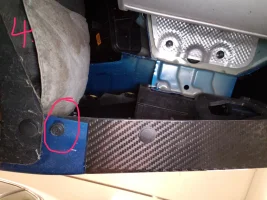
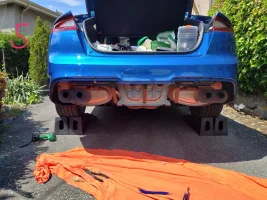
Ok Dom here you go. The job all in all was easy but not simple. You do have to drill out two rivets, one on each side. I circled one in photo 1 they are soft a drill out very quick. Then basically it's 4 bolts ( 10mm) that hold the diffuser to the bottom of the exhaust outlets 2 each side, circled in photo 3 and a number of push-pins like circled in photo 1, a proper tool helps with these. The exhaust outlets will come off with the diffuser, then are removed from the diffuser, two screws each. Now look at the cicles on photo 3, braces are attched to these with push-pins and are a bit tricky getting out and putting back. Once all the push-pins are out start pulling the diffuser. Start at one side by were the rivets were and pull firmly but with caution and the clips will start coming out. The diffuser is quite flexable so it's kinda like peeling it off from one side to the other. Phote 4 just shows what we replaced the rivets with, I will likely replace these with smaller stainless. Before you start hose the the hell out of the inside of the diffuser, a lot of dirt and gravel was built up in there that you don't want in your face as you're lying there on your back. Putting the new one on we started from the centre and worked out, in hindsight I think it might have been easier to work from one side to the other. We had a bitch of a time getting the last 4 or 5 clips on each side by the rivets. With the diffuser being so flexable I think working one side to the other might work better. I huge thank you to my "Stinger Winger" Westcoast. He once again provided the work space and the enthusiastic help that made the job a blast. Thank you so much Westcoast you're a beautiful person that I am so happy to have met. Good luck Dom. Cheers.